2.Set Up Your Online Memex
I want you to use your own personal memex as a way to share your work online. We are going to set up a semi-automated way to publish subsets of your Obsidian vault. The result will be a website that looks rather like our course website - well, it should; I'm using the exact same system!
Let's Do This.
If you know how to use Git at the command line
- Create a new github repository using this template here. Click the green button at the top or use this link.
- Clone the repository you generated into your Obsidian folder/vault.
- Move your notes that you would like to make public to the
repo-name/docsfolder.- Easiest way to do this would be using drag and drop within Obsidian
- Commit and push the changes. Github actions will take care of the rest, publishing your notes using MkDocs, with the Material theme.
- Go to
Settings > Pagesand select the select the Source as yourgh-pagesbranch.
Drag-and-drop method for everyone else
- Make a folder inside your Obsidian vault; call it 'website'. Any notes that you create that you want to share on the net will go into this folder for safekeeping (so you can find them easily on your machine.)
-
While logged into Github, create a new github repository using this template here. Click the green button at the top of that page (the i mage below shows you the green button to press) or click on this direct this link. This creates a copy under your Github.com username of repository pre-configured with everything to turn your notes into a working website.

-
Give a name to this new repository. Note that this will be a public repository, so you don't need to add me as a collaborator.
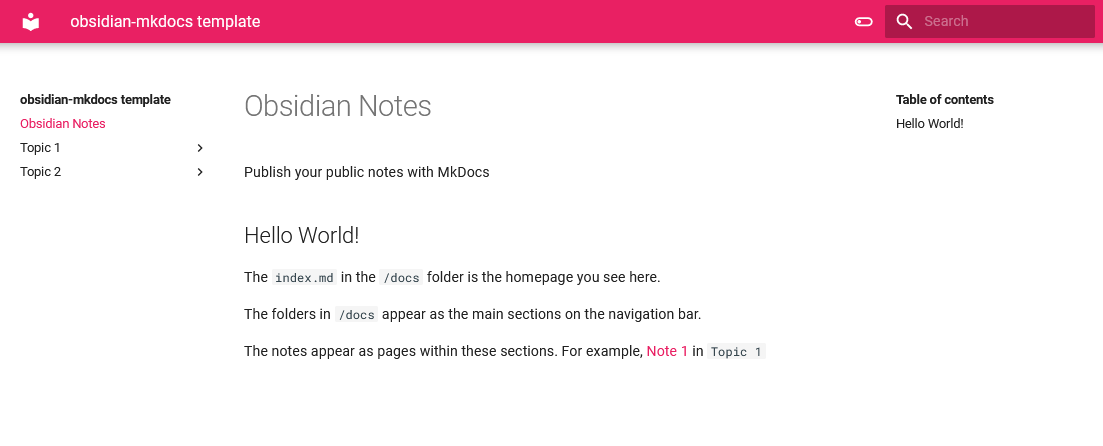
And now you're ready to go! When you eventually drag-and-drop note files onto that repository, Github will automatically build a website from them (that's what this template is configured to do). We'll talk about adding content in a moment, but note that this website built from your notes will be published at <https://your-username.github.io/repo-name/> . E.g., my username is shawngraham ; my user account is at github.com/shawngraham; this repo that I've just configured is called demo. I drag and drop content at github.com/shawngraham/demo ; Github will publish this material at shawngraham.github.io/demo. Spot the way the URL is constructed? Your username goes first, then the domain, github.io (rather than .com!), and then after the slash the name of the repo.
Make Some Content
-
Assuming you set things up using the drag-and-drop method, in your Obsidian vault, make a new note in your 'website' folder; call it
index. This will become the 'home' page of the website. Write some info -Jo's Personal Memxexetc. -
Find this note on your machine (use Windows Explorer or Mac Finder or right-click on the file name in Obsidian's file list on the left side of your screen and select 'reveal in finder')
-
In Github, in the repo you just created, click on
docsin the middle of the screen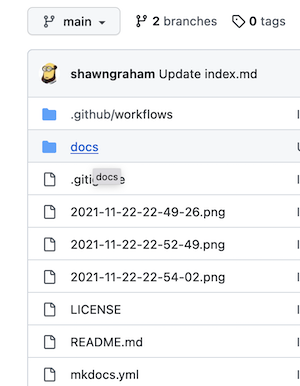
-
Click on the 'add files -> upload files'.
 Drag-n-drop the index.md note onto the upload pane. Once it's finished uploading, click the green 'commit' button at the bottom.
 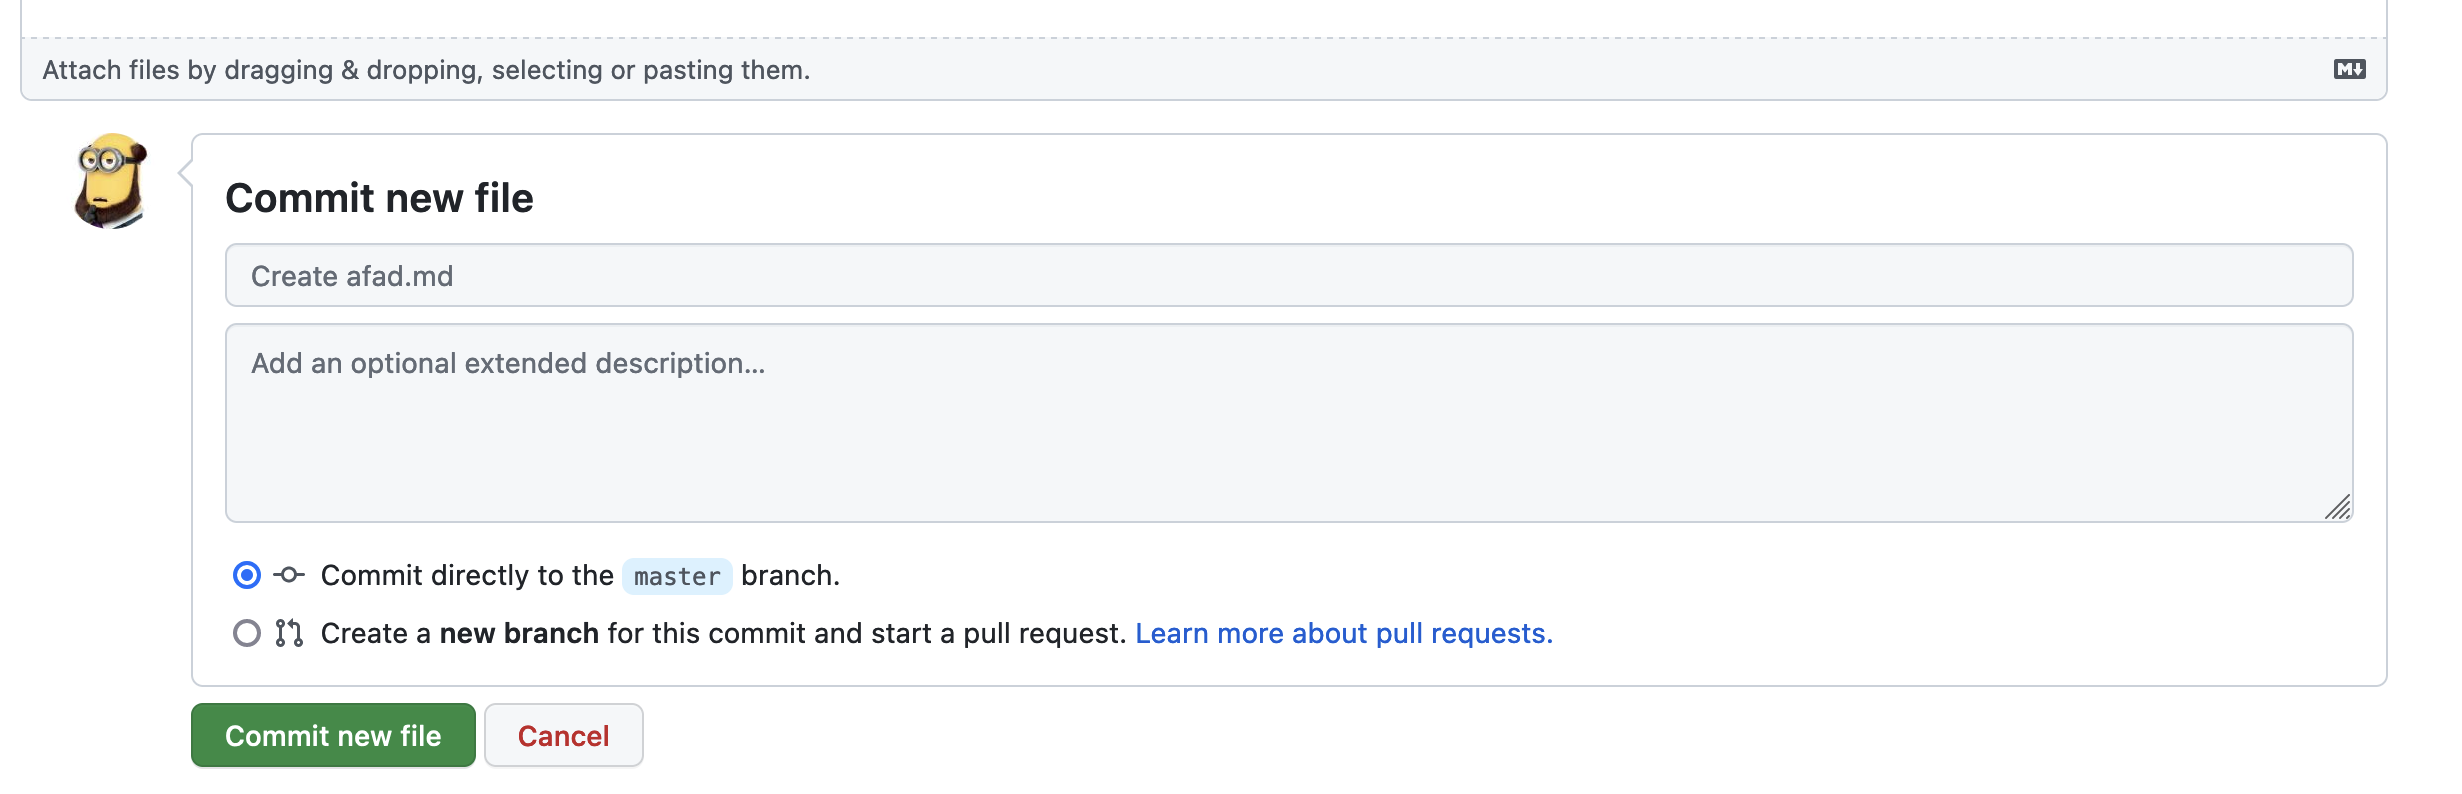 You can leave a little message in the description box to remind yourself why you were making the change, or you can leave it with the defaults. Remember no changes are saved, when working on Github, unless you hit the
 Commitbutton. Now go to the Make Your Site Live section below.
Note
The act of 'committing' a change to your repo sets of a trigger that tells Github to transform your notes into HTML and then publish them. The template that it will use to achieve this uses a static site builder called MkDocs, with the Material theme.
Make Your Site Live
Go to Settings > Pages and select the select the Source as your gh-pages branch. 
Give it a minute or two, and your website will be visible at your-user-name.github.io/name-of-repo.
Updating the site
Move notes that you want to make visible to the world into your Obsidian vault's website folder (or the docs local repo folder, if you're using git on the command line). Drop images into that folder, too, if you want the images to be visible on the web. You can then link and display images using Obsidian's markup, eg . Remember to use the ! in front of the square brackets, with no spaces, to insert an image.
Use github.com upload files feature as described in 'Make Some Content, step 4' to push your new materials online.
Configuring your website
If you want to change the look of your site, you'll need to consult the mkdocs documentation and modify the mkdocs.yml file that you'll spot in the repository, as appropriate. I would recommend leaving this alone unless you already know what you're doing. But if you really want to learn, make an appointment to see me and I'll show you. You can study/copy my version, which you'll find at the source repository for the class website
How do I arrange notes as sections and pages?
By default, the sections and pages will follow the folder structure you create in Obsidian within the folder you're using to keep those materials marshalled together; when you drag and drop them into the /docs folder on Github, the folders and sub-folders will show up as sections. Try not to have white spaces in your folder and file names, as these will be converted to HTML links. The webpage heading will be the same as the first-level heading in the markdown note.
A Video Walkthrough
This video assumes you are not using Git at the command line.